So before I get to the main topic of this post, I have a piece of business to take care of first: My giveaway! The winner is Ali of The Drawing Mannequin! She has a cute, fashion-y blog - go check it out!
And if you read this, Ali, email me! I need to get in touch with you to send you your present!
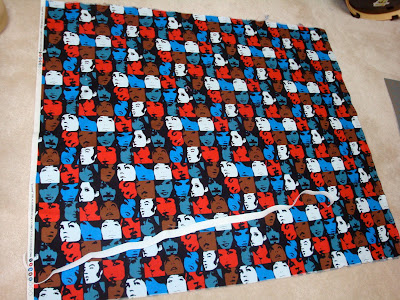
I've had this Alexander Henry fabric with the faces on it for a while now. My mom got me a yard either last Christmas or the Christmas before that and I've been waiting for the perfect project. A couple days ago it hit me - this fabric needed to be a skirt!
So I measured myself a couple times, wrapped the fabric around my hips, then folded it in half and wrapped it around my hips again. I wanted something easy (read: elastic waist, no zipper) and long enough to be worn at the waist or at my hips. Here's what I came up with in order to get the most mileage out of just a yard of fabric.
And note: There are a LOT of pictures in this post. Sorry about the image overkill, but I wanted to be absolutely clear about every step!
What you need: A yard of fabric and enough elastic to go around your waist. That's it! Make sure to get the proper type of elastic to put in a skirt, though. It'll be about 3/4 inches high and have vertical ribs in it so it doesn't roll up.
Step 1. Cut a strip (about 4 inches) off one of the raw edges (cut selvedge to selvedge).
Now, measure the width of your fabric (selvedge to selvedge) and cut it in half. The easiest way to do this is just to fold the fabric in half, press, and then cut along the fold.
The long edges of these two pieces will be the waist and hem. Put the two rectangles right sides together and sew along the short sides, forming a tube. If your fabric has a conspicuous pattern like mine does, make sure to sew them so that the pattern is facing the same way throughout the skirt. Then, make sure to finish off your seams so they don't unravel. This is very important! A simple zig-zag stitch on the raw edges is perfect!
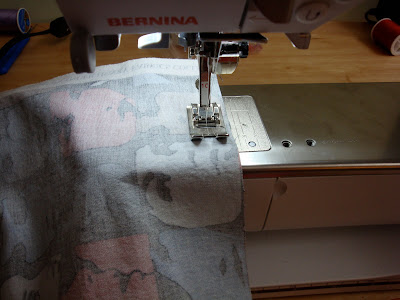
The next step is the hem. Fold up one of the edges of the tube, press, then fold up again (this makes sure there aren't any raw edges that might unravel later), press again, and sew. Because I generally fail completely at hemming, I always end up taking an inch and a half off the bottom of the skirt. If you have the finesse to make a smaller hem, I congratulate you. I've never figured it out. Because my hem was so wide, I sewed twice around the bottom - once next to the folded edge and again right next to the bottom of the skirt. Just because I think it looks nice.
I'd like to add a note here. I'm pretty lazy, so I try to avoid all unnecessary work. For this reason, I very rarely change the color of my thread. Some people are really particular about their thread matching their fabric, but the way I see it, white matches everything.
Now we're going to work with the waistband for a bit. This is a neat little trick I learned in a dress pattern once, and it really is very useful because it does a good job of hiding raw seams with minimal sewing. The waistband is sort of like wide bias tape. You'll see.
So take the strip you cut out to be your waistband and sew it into a tube. Then fold it in half and press. Then unfold your tube, fold one of the edges down about half an inch and press this down, making sure not to iron over the middle crease.
Okay. Now leave this on your ironing board for a minute and pick up your skirt. If you lay the two tubes next to each other, you'll notice that they're not the same size. We need to gather the top of the skirt before we sew it onto the waistband.
With your sewing machine on its longest stitch setting, sew around the top of the skirt. Don't backstitch at the beginning or end of the seam. Take the ends of the threads and pull on them. This'll make the skirt bunch up. Do this until the skirt is about the size of your waistband, then tie the thread ends so they don't go anywhere. Try to make sure your skirt is pretty evenly gathered.
Now pin the raw edge of your waistband to the gathered edge of your skirt (right sides together!) and sew them together.
Back on your ironing board, fold down the middle crease again. The folded edge of the waistband should cover (or come close to covering) the seam you just sewed.
Now sew this down. You can sew from either the front or the back side. I sewed from the outside of the waistband, trusting that it'd catch the folded-down edge, for the simple reason that what the outside of the skirt looks like matters more than the inside. I wanted a nice, clean line along my waistband.
When you're sewing this seam, DO NOT sew all the way around. Leave about two inches between the start and finish. You need this opening to thread your elastic through.
Now find your piece of elastic and cut it to three or so inches smaller than your waist. This is important! At first I cut it to be just the size of my waist, but then it was too big when I put it on so I had to rip out my seam and shorten the elastic.
Pin a safety pin to the end of your elastic and use this to thread it through your waistband. Overlap the two ends of the elastic about an inch and sew them together. Make sure the elastic isn't twisted as you put it through the waistband.
Now finish sewing your waistband shut and voila! Your skirt is ready to wear!
Note: Sorry I look like such a hobbit in these two pictures. My sister doesn't know how to take pictures that don't make me look like a midget.
If you make any skirts like this, please let me know! I'm excited to see how they turn out!


No comments:
Post a Comment